Video Calling App using Firebase and WebRTC for Android and iOS
Develop cross-platform video calling app within no time !!
I am sure most of you have wondered how to develop a video calling app and found it to be a huge task to write servers, native clients, and whatnot.
What if I tell you, you can easily build your video calling app in a day? This blog is going to help you achieve this. With technologies like Firebase, WebRTC and React Native, by the end you will have your native video calling apps that run on iOS and Android.
If these words sound new to you, I’ll request you to learn a bit about what these things are, and continue then. I will only give a small intro to the parts as I will use as we move along with the post.
I will try to keep this post abstract to keep it short so most of you can easily understand to basic logic behind everything.
So let’s get started.
I’ll give a brief to what we are going to achieve here,
We will use WebRTC to set up a call between two users. To notify the users about each other we need someplace where both of the participants can listen to. This is generally called a signalling server which was mostly based on Sockets to create connections and transfer data.
So, to avoid building and maintaining your signalling server, here we are going to use Firebase Firestore. We will create a room, where both the participants can listen to the information they need for making the connection.
On the clients, we will receive the connection information for the users and set up the WebRTC connection between them.
Setting up React Native
I believe most of the people going through this article have prior experience with React Native and setting up native modules. If not, I request you to get yourself familiarised before moving forward.
WebRTC setup on React Native
The first step here would be to set up WebRTC in the project.
I believe this is a redundant step and you should follow the steps on the repository here, https://github.com/react-native-webrtc/react-native-webrtc.
I hope you’ll be able to set up this on your machine, however, if you feel this overwhelming, do let me know and I would love to write a separate post just for this WebRTC setup.
You can also take a look here for the initial setup of WebRTC : https://github.com/baconcheese113/react-native-webrtc-minimal
This was the main motivation behind making this firebase version for the same. You can check out the complete repo here. https://github.com/DipanshKhandelwal/react-native-webrtc-firebase
Once you’re done with WebRTC setup, there is one more waiting in line for you 😅
Firebase setup on React Native
Similar to the previous step I won’t get into details for setting Firebase for React Native. You will find hundreds of other articles that do so. Do check out any of those articles. Or you can also go through this repository on GitHub https://github.com/invertase/react-native-firebase
Again, if you are still not able to set it up, I would be glad to help you do so. But will skip this for now.
So finally, we can dive into some specifics.
Creating a room
First what we will do is point both the users, the caller, and the callee to the same room.
To simplify this, we can directly ask them the room id they want to connect to. Once the users have entered the room id. We can proceed with them to the next screen. This can be done with a simple TextInput.
Call Screen
So finally here is where you create a connection. So we will go through the things happening here.
switchCamera : func
Switches camera side ( front / rear camera ), just changes the stream that is being consumed.
toggleMute : func
Toggles mute for the client.
startLocalStream : func
Here we get the local user media, which returns us the localStream, which is directly connected to an RTCView which stands for Real-time communication View. As soon as we set a stream in the RCTView, it starts displaying the current stream.
startCall : func
So the main logic where the call is established lies here.
- We start by initiating a
new RTCPeerConnection. Which returns us thelocalPC:Local Peer Connectionobject. We also assign ourlocalStream to this localPC object.
It tells thePeer Connection, that this is the stream we are going to use, so please send this to the other side when connected.
const localPC = new RTCPeerConnection(configuration);localPC.addStream(localStream);
- We set
firebase db reference.
* roomRef gives use the reference to the room where the connection information will be exchanged.
* callerCandidatesCollection is thecollectioninside the room where we set thecaller candidate information.
const roomRef = await db.collection('rooms').doc(id);
const callerCandidatesCollection = roomRef.collection('callerCandidates');- Next, we listen to onIceCandidate trigger on
local peer connection. It is triggered whenicecandidateevent occurs on thePeer Connectioninstance.
ICE : Interactive Connectivity Establishment
Simply put it is a framework used by WebRTC for connecting two peers, regardless of network topology.
So when our local peer connection gets a new ice candidate it added it to the callerCandidatesCollection for the callee to listen.
localPC.onicecandidate = e => {
  callerCandidatesCollection.add(e.candidate.toJSON());
};- Next, we will listen to onAddStream trigger on
local peer connection. It is triggered when aMediaStreamis added to thispeer connectionby theremote peer.
So onAddStream we get the stream from the callee and we set it to the other RTCView. As soon as we get the stream, we would be able to see the callee’s stream on our device.
localPC.onaddstream = e => {
  if (e.stream && remoteStream !== e.stream) {
    setRemoteStream(e.stream);
  }
};
Logic behind the connection
So for the next steps, we need to understand how the connection will be established. So explaining it in simple steps.
Caller Side
- Create a
new Local Peer Connection - Assign
localStreamto thePeer Connection - Generate an
offer:
Offer is a kind of a contract which we generate from our peer connection, saying that if anyone wants to connect to us, use this offer to move forward. - Set the generated offer into the
Local Descriptionfor it’sPeer Connection Send the offer to the callee.
Callee Side
- Create a
new Local Peer Connection - Assign
localStreamto thePeer Connection - Use the
offer received from the callerto set theRemote Descriptionfor itsPeer Connection - Generate an
answer:
Answer is also a kind of contract which is generated after the offer has been set to the Peer Connection, saying that I have accepted your offer, and here is the answer, whoever created the offer can use it to connect to me. - Set the generated answer into the
Local Descriptionfor it’sPeer Connection Send the answer to the caller
So once the offer and answer have been exchanged and the corresponding values have been set in the Local and Remote Descriptions of the Peer Connections, the connection is successful and can be used to exchange streams.
Moving forward with the code.
- We generate an
offerand set it to the local peer connection.
const offer = await localPC.createOffer();
await localPC.setLocalDescription(offer);- Now we set the value of
roomRefin firebase with the offer. This will set the value ofrooms/{roomId}/offer/to the offer generated.
const roomWithOffer = { offer };
await roomRef.set(roomWithOffer);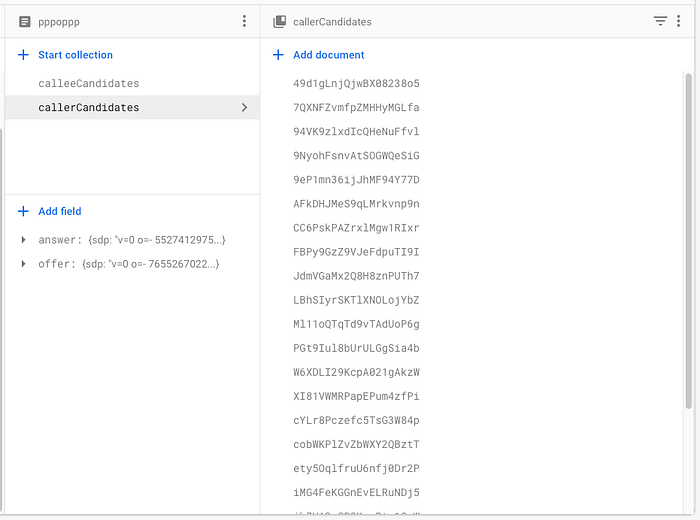
- Now we listen back to the same
roomReffor thecallee to set an answer. On receiving any data, we check if there is ananswerproperty set to theroomRef. If there is an answer available, we set the answer as theRemote Descriptionof thePeer Connectionas the answer.
roomRef.onSnapshot(async snapshot => {
  const data = snapshot.data();
  if (!localPC.currentRemoteDescription && data.answer) {
    const rtcSessionDescription = new RTCSessionDescription(data.answer);
    await localPC.setRemoteDescription(rtcSessionDescription);
  }
});- We finally, listen to
calleeCandidates, and check if there arenew IceCandidatesadded by the callee, on receiving them, we just add them to our local Peer Connection.
roomRef.collection('calleeCandidates').onSnapshot(snapshot => {
  snapshot.docChanges().forEach(async change => {
    if (change.type === 'added') {
      let data = change.doc.data();
      await localPC.addIceCandidate(new RTCIceCandidate(data));
    }
  });
});
That’s it. We are done from the Call Screen. 😌
Join Screen
On the join screen, we will pretty much do the same things that we saw in the logic for connection part.
joinCall : func
- Connect to
roomRefand get the data.
const roomRef = await db.collection('rooms').doc(id);
const calleeCandidatesCollection = roomRef.collection('calleeCandidates');
const roomSnapshot = await roomRef.get();
if (!roomSnapshot.exists) return- Create a
new RTCPeerConnection - Add
localStreamto thePeer Connection
const localPC = new RTCPeerConnection(configuration);
localPC.addStream(localStream);- Listen to
new IceCandidatefrom local peer connection; on trigger, add them tocalleeCandidatesCollectionon firestore
localPC.onicecandidate = e => {
   calleeCandidatesCollection.add(e.candidate.toJSON());
};- Listen to
onAddStreamand on trigger, we get the stream from the caller and we set it to the remoteRTCView. As soon as we get the stream, we would be able to see the callee’s stream on our device.
localPC.onaddstream = e => {
  if (e.stream && remoteStream !== e.stream) {
    setRemoteStream(e.stream);
  }
};- Get the
offerdetails from thefirestore( thatcaller added). - Assign the
offerto theRemote Descriptionof theLocal Peer Connection
const offer = roomSnapshot.data().offer;
await localPC.setRemoteDescription(new RTCSessionDescription(offer));- Generate an
answerfrom theLocal Peer Connection - Assign the
answerto theLocal Description
const answer = await localPC.createAnswer();
await localPC.setLocalDescription(answer);- Set the answer to the firestore
roomRef
const roomWithAnswer = { answer };
await roomRef.update(roomWithAnswer);- Finally listen to
callerCandidatescollection on firestore, and on new document added, addnewIceCandidateto the Local Peer Connection.
roomRef.collection('callerCandidates').onSnapshot(snapshot => {
  snapshot.docChanges().forEach(async change => {
    if (change.type === 'added') {
      let data = change.doc.data();
      await localPC.addIceCandidate(new RTCIceCandidate(data));
    }
  });
});
That’s all folks 🎉 🎊
Navigating between screen
To keep things simple and not dependent on other packages, I added a simple file to handle navigation.
Hopefully, if everything is correct this will work for you. Let me know the troubles you get in while setting it up, I can also try to solve it with you.
You can find the whole working code here: https://github.com/DipanshKhandelwal/react-native-webrtc-firebase
Please let me know if this helped you. Thank you for reading this !! 😃🙇
Hey! I am Dipansh Khandelwal, a Computer Science Engineer and a Full Stack Developer. I have been programming for around 4 years now, working remotely most of the time, with a wide tech stack including native Android and iOS, React Native, React, Firebase, Django, Express, and more. I like to listen to Audiobooks and play Badminton.
You can connect with me on LinkedIn@dipanshkhandelwal and check out some more work at GitHub@DipanshKhandelwal
